Kraken Academy
Learn the ropes, rule the seas
Payments: Creating Products, Custom Tax Rates, & Invoices 💻 💲
Welcome to the Products side of the Payments space in your Kraken Business SuiteTM. Here you will learn how to create, customize, and duplicate products; add them to an invoice, and how to customize tax rates in your settings.
1. How to Create Products
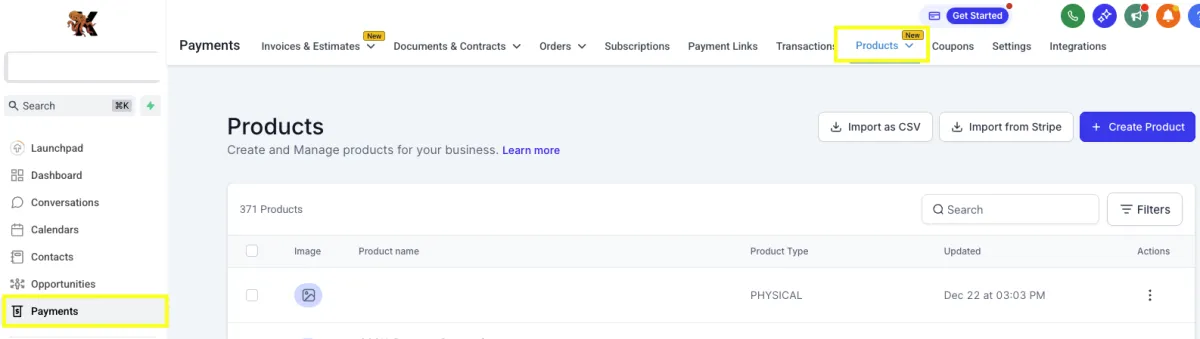
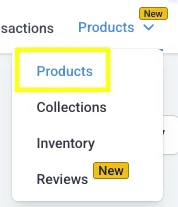
Navigate to Payments, on your left-hand menu, then select the Products tab, and from that dropdown select Products.
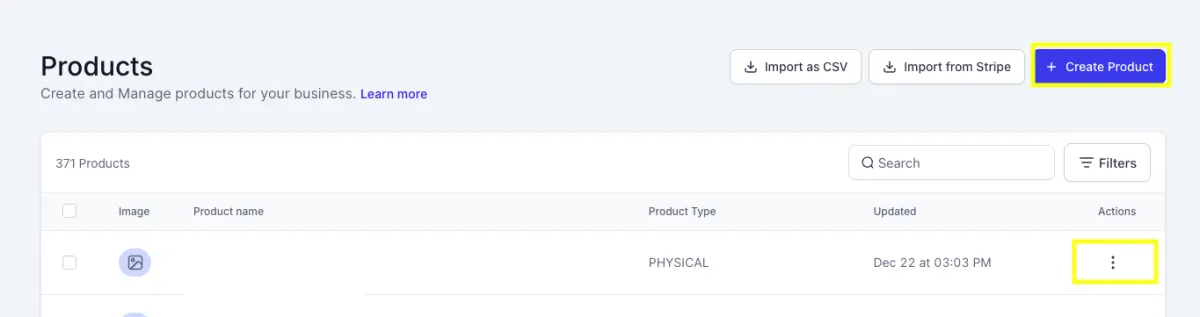
Click the blue Create Product button in the top right corner to add a new product.
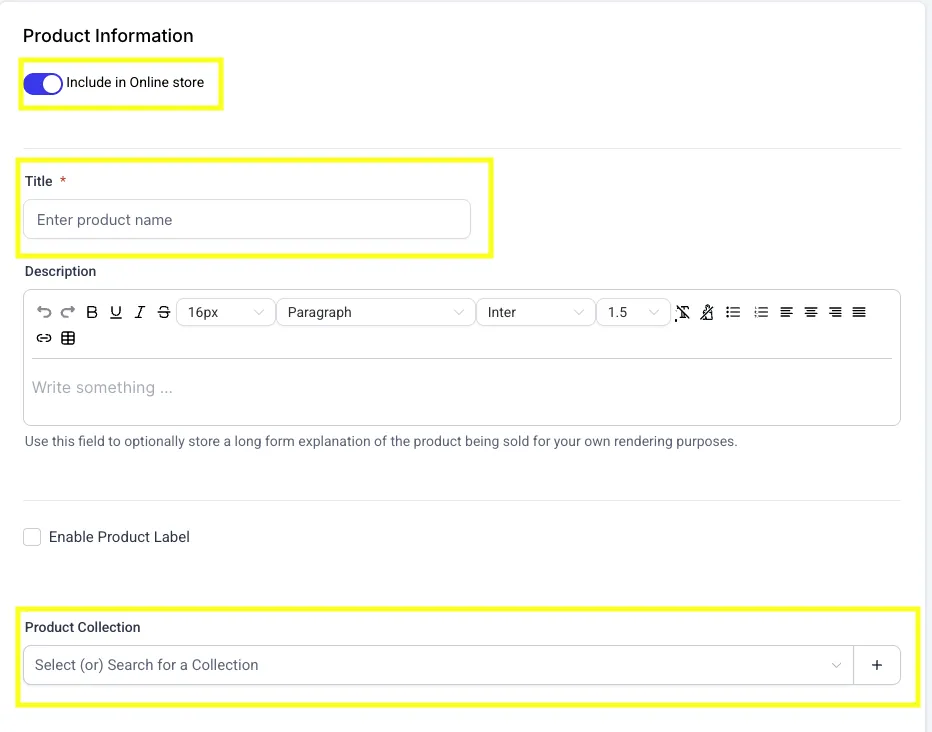
Enter the title for the product, and a description (optional). If applicable toggle the Include in Online Store to on, then select the Product Collection dropdown to add the product to a collection for easier searching.
If you need to apply a specific tax rate to a specific product, scroll down to Include Tax in Prices, check the box titled Attach Tax Rates, then select the rate from the dropdown (these are custom rates, please refer to Step 3 to learn how to set this up). Once this is added, that tax rate will show on the line item in an invoice for this product.


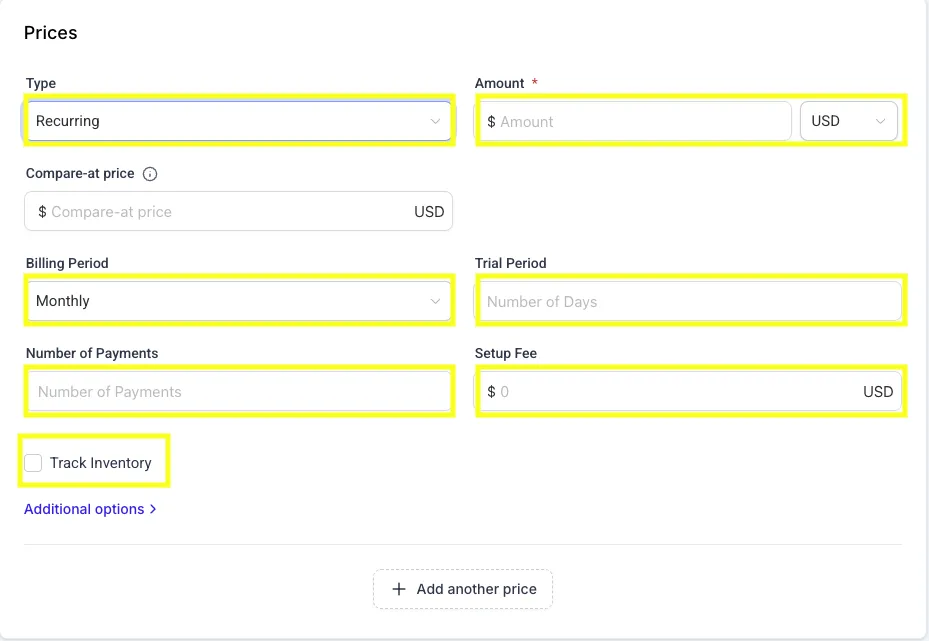
Set your Pricing. First you must select the type: One-Time or Recurring. You can select the option to Track Inventory if that applies (learn more about inventory management on Step 4). If you select Recurring, it gives you the option to set the Billing Period, a Trial Period, Number of Payments, and a Setup Fee if that applies.

2. How to Duplicate Existing Products
If you need to quickly add an item, and there is a preexisting item that is similar, you can duplicate it by clicking the 3 dots to the right of a product on your product list. These 3 dots also allow you to Edit, Duplicate or Delete an item. Follow Step 1 to make the necessary changes, then click Save in the top right corner.

3. How to Create a Tax Rate
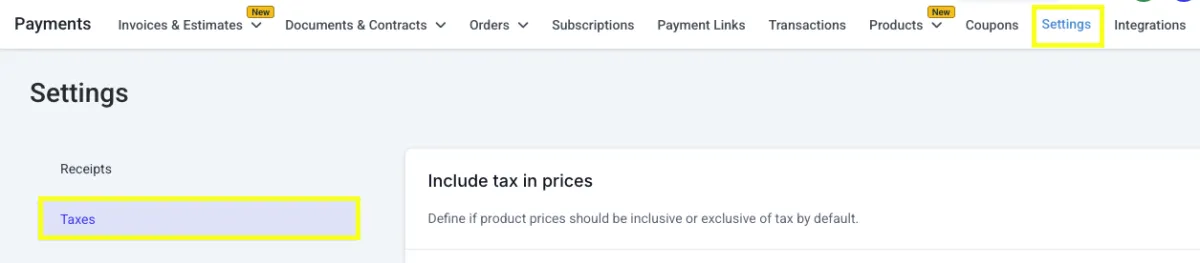
To create a tax rate, navigate to Payments on your lefthand menu, go to Settings on the top right of the menu, then select Taxes.
Click the blue Add Tax button to create a new custom rate.

NOTE: You may also add a new tax rate from the product details. Check the Attach a Tax Rate box, then click the + icon to the right of the dropdown.
Fill in the details of the tax rate, then click Add (name and rate are the only required fields), then click Add.

4. Managing Your Inventory
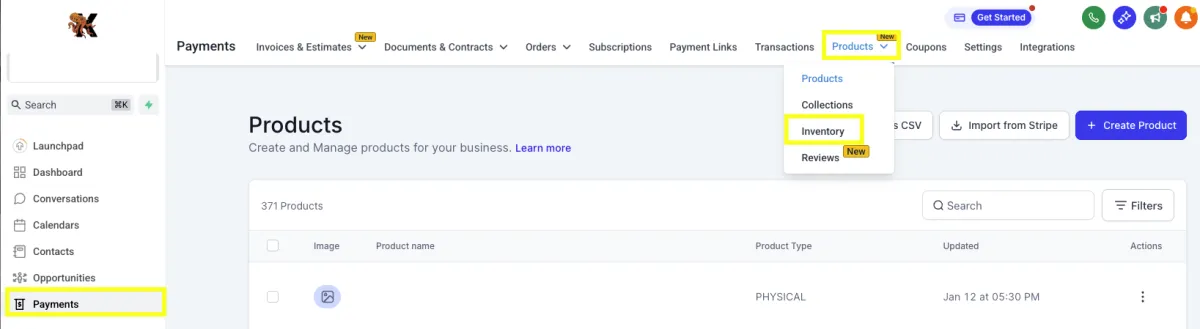
To manage your inventory (if that applies to the types of products you’re selling), navigate to Payments on the lefthand menu, click the Products dropdown, then select Inventory.
To track inventory on a product, toggle the Track Inventory switch to the right of the product description to on; add your quantity. Toggle the Continue Selling when Out of Stock on if desired.

Be sure to click the blue Save button on the top right corner before navigating away from the page to save any changes made to inventory.

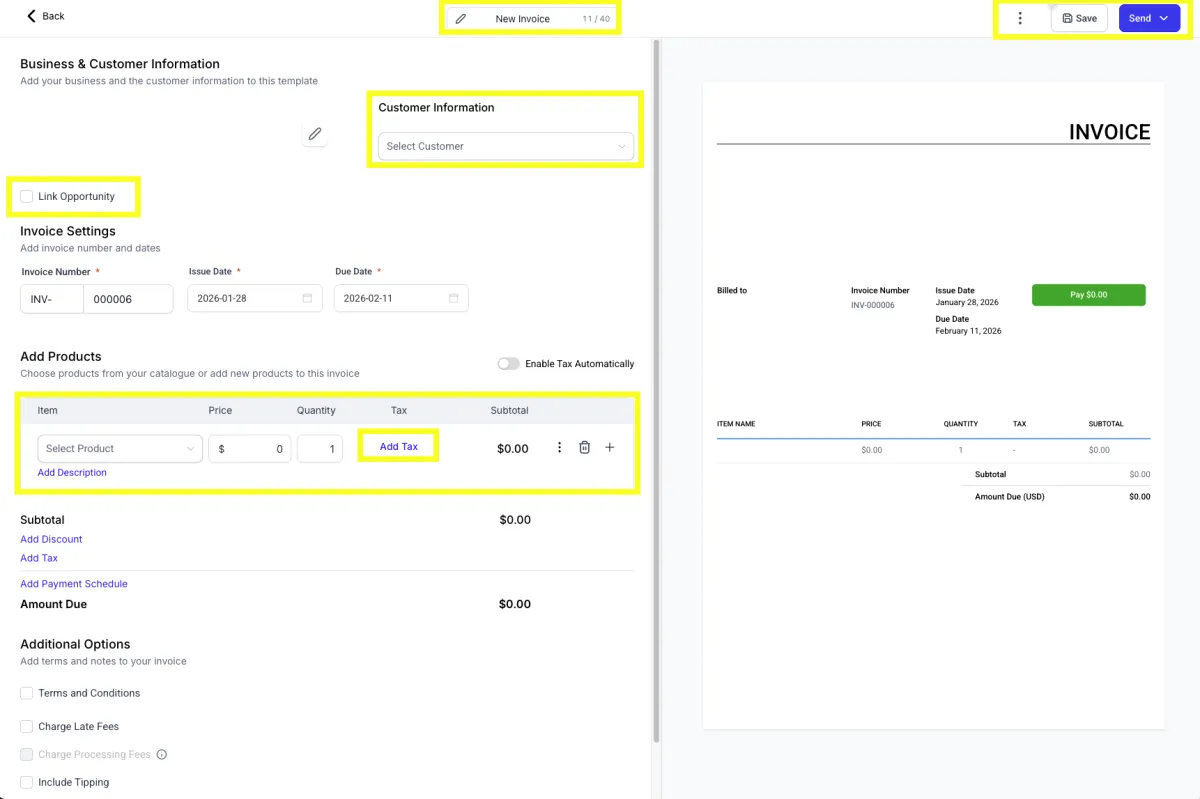
5. Creating an Invoice
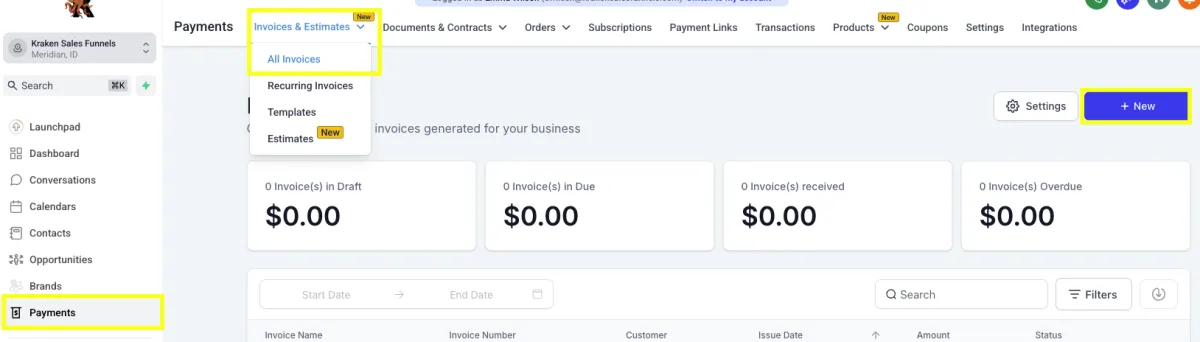
Now that your products are created, and inventory is tracked (if applicable), you can add them to your invoices. Navigate to Payments on your left hand menu, click Invoices & Estimates, then All Invoices. On the top right, click the blue button + New to begin creating an invoice.
Select what type of invoice you’d like.

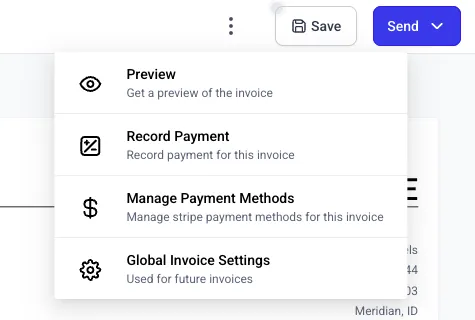
Once you’re in the invoice, add all applicable details (invoice name, customer information, link opportunity, item, tax, discounts, tips, etc). Once you fill out the necessary fields, select Save, Send, or click the three dots at the top right corner, then click Preview to double check the invoice before sending.
Need Help?
If you encounter any issues during the process, submit a support ticket for assistance.